Easier Code Sharing with Claude Projects & ChatGPT
Flatten your repository and drag & drop it into your favorite AI assistant
If you’ve tried to get AI assistance when working on your code using tools like Claude or ChatGPT, you’ve probably run into a common issue: uploading your repository. For one or two files it’s straightforward, but often you want to give the LLM a global view of your entire repository so that you can ask questions, fix bugs, and even get help developing new features.
When uploading a whole repository to an LLM application, there are two main challenges:
- Uploading the whole repository at once, rather than file by file.
- Preserving your project’s directory structure, which is lost if you simply upload individual files, and it’s often critical for understanding the codebase.
Without an easy solution to these challenges, working with LLMs on complex projects becomes tedious and slow. Having to upload each file individually and then explain the project structure is too inefficient. There has to be a better way…
The inspiration for solving this came from watching Greg Kamradt’s interview with Nicole Hedley from Headstart (if you’re not familiar with Greg’s YouTube channel, I highly recommend it - it has great content and very interesting interviews with AI builders). During the interview, Nicole discusses how she leverages Claude Projects for development and mentions using a script to flatten code repositories for easy uploading.
It is a very simple and smart solution. A script that takes your repository and creates a flattened version where all the files are in a single directory, but with their original paths encoded in the filenames. For example, take this React project structure:
my-app/
  ├── src/
  │   ├── components/
  │   │   └── Button.jsx
  │   └── utils/
  │       └── validation.js
  └── package.json
The script transforms it into:
my-app_flat/
  ├── src__components__Button.jsx
  ├── src__utils__validation.js
  ├── tests__Button.test.js
  └── package.json
And now you only have to drag and drop these files into Claude Projects or ChatGPT (or any other LLM tool you are using). In seconds, you can start analyzing and discussing your entire codebase with the LLM, which maintains full context of your project structure.
Of course, there are already more advanced tools like Cursor and GitHub Copilot with LLM integration directly in your code editor. But sometimes you just want a simpler approach, directly analyzing your codebase with Claude or ChatGPT, with full control and transparency over your prompts and which files to include in the context. This is where this utility is really helpful.
Inspired by Nicole’s solution, I built my own version of the repository flattener in Python, which you can find in this GitHub repository. In the next section, I’ll walk through how the code works and show you how to use it in your own projects.
Understanding How the Script Works
Let’s dive into the implementation details of the script. The code is quite simple - the entire implementation is less than 150 lines of code. And you can easily adap it to fit your specific needs.
The script starts with a set of configuration variables that make it highly customizable. They define what should and shouldn’t be included in our flattened repository:
EXCLUDED_DIRS = {
    'node_modules', '.git', '.venv', 'venv', '__pycache__', 'dist', 'build', 'data'
}

EXCLUDED_FILES = {
    '.gitignore', '.DS_Store', 'package-lock.json', 'yarn.lock', 'uv.lock', '__init__.py',
    '.env', '.env.local', '.env.development', '.env.production', '.env.test', '.env.staging'
}

EXCLUDED_EXTENSIONS = {
    '.pyc', '.pyo', '.lock', '.log', '.map', '.pdf', '.jpg', '.jpeg', '.png',
    '.gif', '.ico', '.svg',
}

# Default included extensions for Python/JavaScript projects
DEFAULT_INCLUDED_EXTENSIONS = {
    '.py', '.js', '.jsx', '.ts', '.tsx',  # Source code
    '.json', '.yaml', '.yml', '.toml',    # Config files
    '.md', '.txt', '.rst'                 # Documentation
}
In general, you probably don’t want to include directories and files like node_modules/, .git/, .venv/, package-lock.json, images, environment variables, binary files, etc. These would just bloat your context window and aren’t relevant for code understanding. The script automatically excludes them for you.
Since I generally work with Python and JavaScript, I’ve tuned the configuration variables for these environments. But if you’re working with different technologies, feel free to adjust them to match your needs!
The main function of the script is the flatten_repository function. It takes a source directory and creates a new flattened version with the suffix _flat. So if you run it on my-project, you’ll get a new my-project_flat directory right next to it (as a sibling directory), containing all your relevant files in a flattened structure.
Inside this function, there’s a simple loop that processes your repository:
for file_path in source_dir.rglob('*'):
    if file_path.is_dir():
        continue

    if not should_include_file(file_path, include_all_extensions):
        continue

    # Create new filename using original path
    rel_path = str(file_path.relative_to(source_dir))
    flat_filename = encode_path_as_filename(rel_path)

    # Check for collisions
    if flat_filename in processed_files:
        print(f"Warning: Duplicate file name detected: {rel_path}", file=sys.stderr)
        continue

    processed_files.add(flat_filename)

    # Copy file to output directory
    try:
        shutil.copy2(file_path, output_dir / flat_filename)
        print(f"Copied: {rel_path}")
    except Exception as e:
        print(f"Error copying {rel_path}: {e}", file=sys.stderr)
This loop does several things. First, it skips directories since we only want to process files. Then, it checks each file against our inclusion/exclusion rules. For files that pass these checks, it creates a new filename that preserves the original path structure, checks for any naming conflicts, and finally copies the file to our flattened directory.
The decision about which files to include is handled by the should_include_file function, which applies our configuration rules:
def should_include_file(path: Path, include_all_extensions: bool) -> bool:
    """Determine if a file should be included in the flattened output."""
    # Check if path contains excluded directories
    if any(part in EXCLUDED_DIRS for part in path.parts):
        return False

    # Check if filename is in excluded files
    if path.name in EXCLUDED_FILES:
        return False

    # Check if extension is excluded
    if path.suffix.lower() in EXCLUDED_EXTENSIONS:
        return False

    # If include_all_extensions is True, include all non-excluded files
    # Otherwise, check if extension is in DEFAULT_INCLUDED_EXTENSIONS
    return include_all_extensions or path.suffix.lower() in DEFAULT_INCLUDED_EXTENSIONS
And how do we encode the each file’s path into its filename? With this simple line:
def encode_path_as_filename(path: str) -> str:
    """Convert a file path into a filename that preserves the path structure."""
    return path.replace('/', FILENAME_PATH_SEPARATOR)
The script uses double underscores (__) as the path separator in filenames because slashes aren’t safe to use in filenames in many operating systems. When the script sees a file like src/components/Button.jsx, it transforms it into src__components__Button.jsx. You can customize the separator by updating the FILENAME_PATH_SEPARATOR configuration variable.
How to Use the Script
To use it, navigate to the directory containing flatten_repo.py and run:
python flatten_repo.py /path/to/your/projectThe script accepts two arguments:
- The path to the directory you want to flatten (optional, defaults to current directory).
--include-alloptional flag to include all file extensions except those explicitly excluded inEXCLUDED_EXTENSIONS(by default, the script only includes the extensions inDEFAULT_INCLUDED_EXTENSIONS).
But there is a more convenient way to use the script: make it available as a global command. This is how I’ve set this up it in macOS:
-
Make the script executable:
chmod +x flatten_repo.py -
Create a symlink (or a copy) in your system’s bin directory:
ln -s /path/to/flatten_repo.py /usr/local/bin/flatten-repo
Now you can run the command flatten-repo directly from any repository!
💡 Note: On Linux, the process is essentially the same. On Windows, you need to either add the script’s folder to your PATH or create a batch file that calls the script.
Let’s see it in action in a full-stack application repository that contains a Python backend and a React frontend:
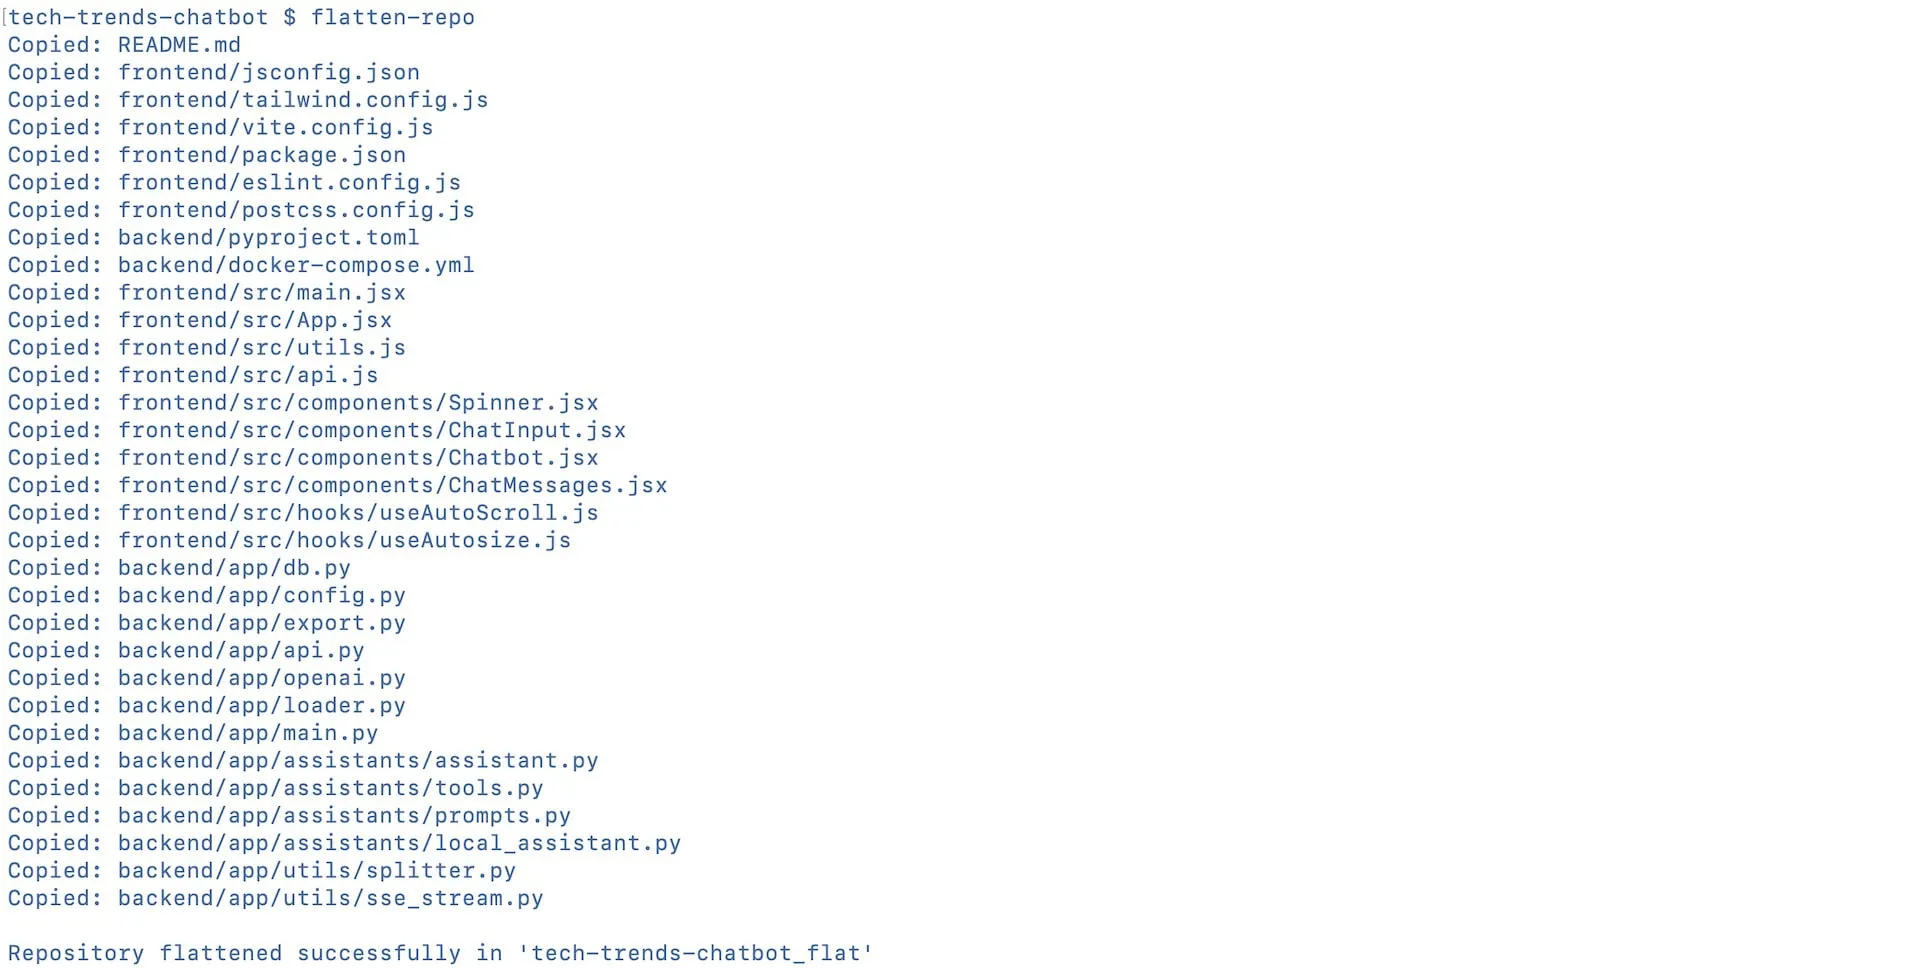
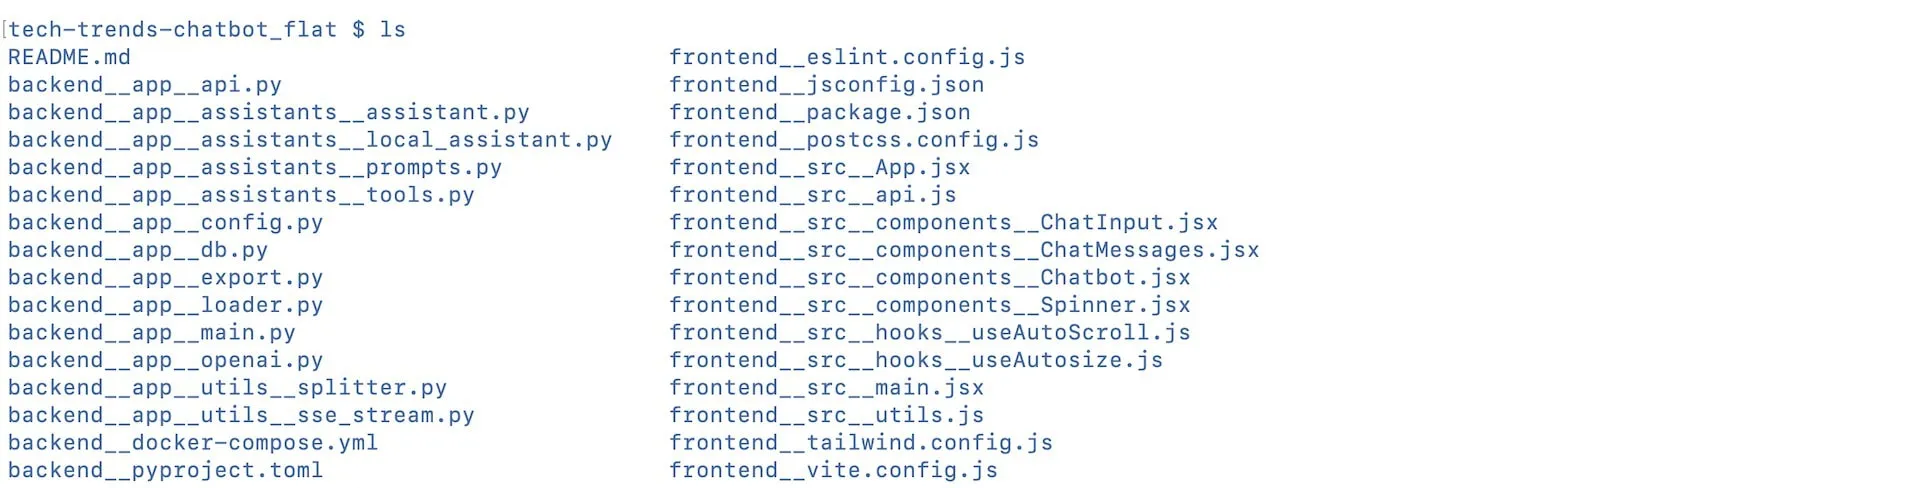
With this utility in your toolkit, you can now easily prepare any repository for AI analysis and quickly drag and drop it in your favourite AI assistant.
And as mentioned before, you can find the script in this GitHub repository. Hope you find it helpful!